This guide contains affiliate links. We may earn a commission at no extra cost to you — see our Affiliate Disclosure and Affiliate Disclosure Policy for details.
✈️ Quick Take
USA Visa Types Indian travelers applying for a U.S. visa in 2026 should expect a DS-160 form, an MRV fee payment, and an in-person interview at their nearest consulate — with wait times varying by city.
✈️ Key Highlights
- Major consulates in Delhi, Mumbai, Chennai, Hyderabad, and Kolkata often have different appointment backlogs — check availability before choosing where to apply.
- Pay the MRV fee and keep the receipt; you’ll need it to both book your interview slot and present on interview day.
- Insider tip: bring strong proof of ties to India (job letter, property, family) — it’s the single biggest factor consular officers weigh.
USA Visa Types & Requirements
USA Visa Types planning a trip to the United States starts with one big question: which visa do you actually need? Between tourist visas, student visas, work permits, and transit categories, the U.S. immigration system can feel like alphabet soup. This guide breaks down every major USA visa category, walks through the application process step by step, and covers fees, eligibility, and the most common reasons applications get rejected — so you can apply with confidence in 2026.
To book your stay, click here. To Book Local Travel, click here
Traveling overseas? Click here to buy an eSIM. For more info, click here
Table of Contents
US Visa Guide for Tourists & Business Travelers (2026): Everything You Need to Know
USA Visa Types Thinking about a trip to the United States — whether it’s a family vacation, a friend’s wedding, or a string of client meetings in New York? Before you get to the fun part (booking flights, planning your itinerary), there’s one hurdle every traveler has to clear first: getting the right visa.
For most tourists and business travelers, this usually comes down to a single visa category — the B1/B2. But between the paperwork, the embassy appointment, the biometrics, and the interview itself, the process can feel more intimidating than it needs to be. This guide walks through exactly what to expect, where to go if you’re applying from India, and how each stage of the process actually works.
Do You Need a Tourist Visa or a Business Visa?
USA Visa Types the US doesn’t actually separate “tourist” and “business” travelers into two different visas most of the time — they’re usually combined into one.
- B1 (Business Visa): For attending conferences, meeting clients, negotiating deals, or other short-term business activity. You can’t take up employment or draw a salary from a US company on this visa.
- B2 (Tourist Visa): For vacations, sightseeing, visiting family, or medical treatment.
- B1/B2 Combined: Most applicants are issued this dual-purpose visa, which covers both business trips and leisure travel under one document. This is the visa the vast majority of Indian travelers heading to the US will apply for.
If your trip involves a mix of a conference and a bit of sightseeing afterward, the combined B1/B2 covers you — you don’t need to apply separately for each purpose.
Quick note on other categories: if you’re moving to the US for work or study rather than a short trip, you’d be looking at something like an H1B (skilled work) or F1 (student) visa instead, both of which involve employer or school sponsorship and a very different application track. This guide focuses on the tourist/business track, since that’s what the overwhelming majority of travelers need.
Book Your Tour Package in USA – San Francisco
The Application Process, Step by Step
1. Fill Out the DS-160
This is the online nonimmigrant visa application form, and every single applicant needs to complete it before doing anything else. A few things that trip people up:
- The form can time out mid-session, so try to finish it in one go
- Enter your name and details exactly as they appear on your passport
- Your photo upload needs to meet strict specifications (plain white background, correct size)
- Once submitted, save your confirmation number — you can’t book an interview without it
2. Pay the Visa Fee (MRV Fee)
The Machine Readable Visa fee is the standard application fee for a nonimmigrant visa, and it has to be paid before you can schedule an appointment. Hang onto your payment receipt — you’ll need it again both to book your slot and to bring with you to your interview.
3. Book Your Biometrics & Interview Appointment
Once your DS-160 is submitted and your fee is paid, you’ll register on the visa appointment portal for your local embassy or consulate. From there, you’ll typically be scheduled for two separate visits:
- An appointment at a Visa Application Center (VAC) for biometrics
- An interview at the embassy or consulate itself
Appointment availability shifts a lot depending on the city and time of year, so it’s worth booking as early as your travel plans allow rather than waiting until the last minute.
US Embassy & Consulate Offices in India
India has one embassy and four consulates handling visa services, and which one you apply through depends on where you live, not which one you’d prefer. Each office covers a specific set of states.
US Embassy — New Delhi
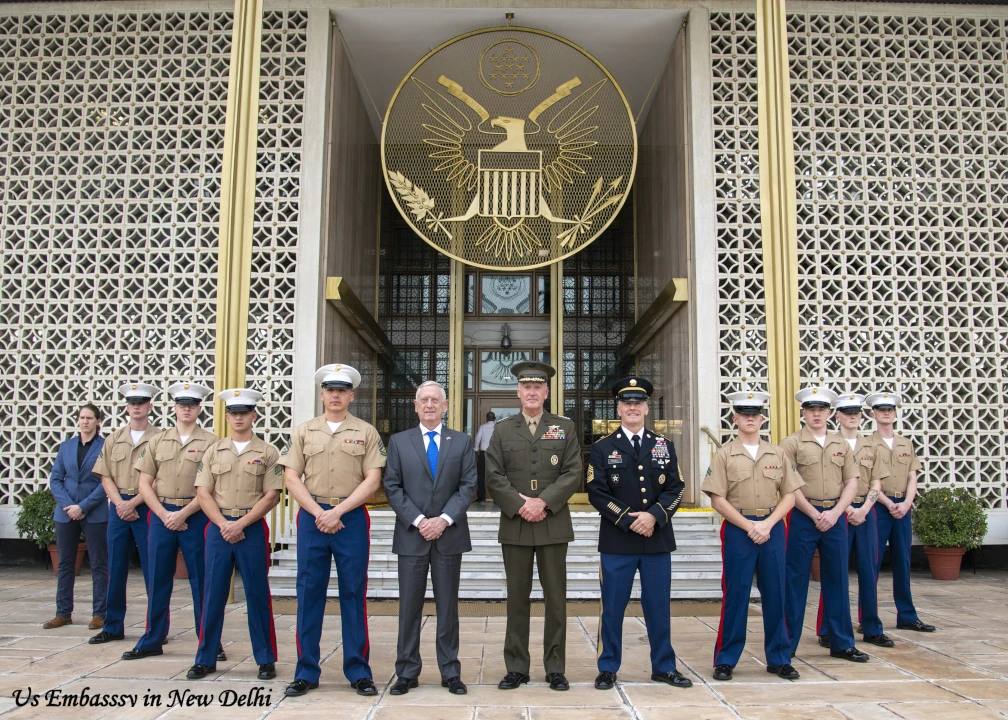
Address: Shantipath, Chanakyapuri, New Delhi – 110021 Phone: 91-11-24198000 · Fax: 011-91-11-2419-0017 Covers: Delhi, Haryana, Himachal Pradesh, Jammu & Kashmir, Punjab, Uttarakhand, Rajasthan, Uttar Pradesh, and Bhutan
US Consulate General — Mumbai
Address: C-49, G-Block, Bandra Kurla Complex, Bandra East, Mumbai 400051 Phone: 91-22-26724000 Covers: Maharashtra, Gujarat, Madhya Pradesh, Chhattisgarh, Goa, and Daman, Diu, Dadra & Nagar Haveli
US Consulate General — Chennai
Address: Gemini Circle, No. 220 Anna Salai, Chennai – 600006 Covers: Tamil Nadu, Karnataka, Kerala, Andhra Pradesh, and neighboring southern states/UTs
US Consulate General — Hyderabad
Address: Survey No. 115/1, Financial District, Nanakramguda, Hyderabad, Telangana, 500032 Phone: 040-6932-8000 Covers: Telangana and Andhra Pradesh
US Consulate General — Kolkata
Address: 5/1, Ho Chi Minh Sarani, Kolkata – 700071, West Bengal Phone: 91-33-6827-2400 · Fax: 91-33-2288-1616/0356 Covers: West Bengal and the northeastern states
A few practical notes: all nonimmigrant visa interviews at every one of these offices are conducted strictly by appointment — you can’t walk in. And general embassy working hours run Monday to Friday, roughly 8:30 AM to 5:00 PM, though each office closes on its own list of Indian and US holidays, so it’s worth checking the specific consulate’s holiday calendar before you try to book anything around a public holiday.
For emergencies involving American citizens, each office runs a 24-hour line — if you’re calling from within the US, dial the 011-91 prefix first.
Book Your Stay in San Francisco
Biometrics & Interview: What Actually Happens, Step by Step
This is the part that causes the most anxiety, so here’s exactly how the two stages unfold once your appointment is booked.
Stage One: Biometrics at the Visa Application Center (VAC)
- Arrive with your documents. Bring your passport, DS-160 confirmation page, appointment letter, and visa fee receipt. Leave electronics, bags, and sharp objects at home — most centers have strict prohibited-item lists.
- Security and document check. Staff verify your appointment letter and passport against your DS-160 details before letting you through.
- Digital fingerprint scan. All ten fingers are scanned electronically — quick, ink-free, and takes only a couple of minutes.
- Photograph capture. A digital photo is taken on-site as part of your biometric record, even if you already uploaded one with your DS-160.
- Passport submission (in some cases). Depending on the center’s process, your passport may be collected here for later stamping, or you may keep it and bring it to your interview instead.
This stage is administrative — there’s no interview or questioning involved. Most people are in and out within 15–30 minutes barring queues.
Stage Two: The Visa Interview
- Check-in at the embassy/consulate. Arrive at your scheduled time (arriving too early can actually cause delays, since most posts don’t accommodate early arrivals). Show your appointment confirmation and passport at the gate.
- Security screening. Similar restrictions apply as at the VAC — no electronics, no large bags.
- Queue and document verification. An officer checks that your paperwork (DS-160 confirmation, fee receipt, supporting documents) is in order before you’re called to a window.
- The interview itself. A consular officer asks a short set of questions — typically just a few minutes’ worth. Expect questions like:
- What’s the purpose of your trip?
- How long do you intend to stay?
- Who’s funding the trip?
- What ties do you have back home (job, family, property)?
- What do you do for a living?
- On-the-spot decision. Most applicants find out at the window whether their visa is approved, refused under Section 214(b), or flagged for administrative processing (221(g)), which means additional documents or review are needed before a decision.
- Passport return. If approved, your passport (with the visa stamped in) is typically returned to you via courier within a few business days rather than handed back immediately.
Interview tips that actually help:
- Keep answers short and direct — over-explaining can raise more questions than it answers
- Bring your documents organized and easy to hand over quickly
- Be consistent — your DS-160, your documents, and your spoken answers should all tell the same story
- Dress neatly and treat it like a professional appointment, not a casual chat
Documents to Bring
- Valid passport (with at least six months’ validity beyond your planned stay)
- DS-160 confirmation page
- Visa fee payment receipt
- Passport-style photo (if not already uploaded)
- Proof of ties to home — employment letter, property documents, family details
- Financial proof — bank statements or a sponsor’s letter
- Any trip-specific documents — invitation letter for business trips, hotel bookings or itinerary for tourism
What Gets Applications Rejected
Most refusals fall under Section 214(b), and the reasoning is almost always one of these:
- Not enough evidence of strong ties to home (job, family, assets)
- A vague or inconsistent explanation of why you’re traveling
- Missing or incomplete documentation
- A prior visa violation or overstay on record
If you’re refused, you can reapply, but doing so without addressing the original reason rarely changes the outcome.
Book Your Flight Ticket
Fees to Budget For
USA Visa Types fees vary by category and change periodically, so always check the current rate on your consulate’s official site before applying. Beyond the base MRV fee, factor in courier charges for passport return and, for certain nationalities, a reciprocity/issuance fee charged after approval.
Do’s for Your US Visa Application
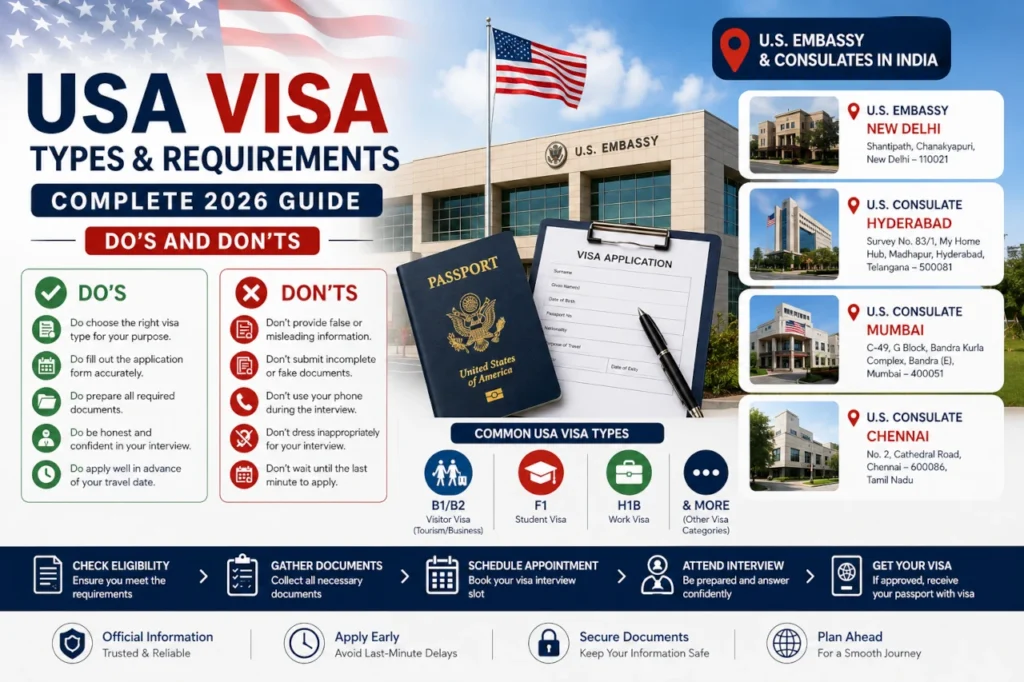
✅ Do’s
- Do fill out the DS-160 in one sitting. The session can time out, and losing progress halfway through is a common headache.
- Do match your passport exactly. Names, dates, and details on your DS-160 and supporting documents should mirror your passport precisely.
- Do keep every payment receipt. You’ll need your MRV fee receipt to book your appointment and again at the interview.
- Do bring strong proof of ties to home. Employment letters, property papers, or family details go a long way in showing you intend to return.
- Do arrive on time — not too early, not late. Most centers and consulates don’t accommodate early arrivals, and latecomers risk losing their slot.
- Do keep your interview answers short and consistent. Match what you wrote on your DS-160; don’t introduce new details on the spot.
- Do double-check current fees and requirements. These get updated periodically on the official consulate site — don’t rely on last year’s numbers.
- Do book your appointment early. Wait times swing a lot by city and season, so give yourself buffer room before your travel dates.
- Do bring only permitted items. Check the VAC/embassy’s prohibited items list in advance so you’re not turned away at security.
❌ Don’ts
- Don’t leave documents disorganized. Fumbling through a messy folder at the window wastes the officer’s time and doesn’t help your case.
- Don’t leave the DS-160 half-done. Incomplete or rushed forms lead to inconsistencies that raise flags later.
- Don’t over-explain during your interview. Long, meandering answers can create more doubt than a short, direct one.
- Don’t bring electronics or bags to the VAC/embassy. Phones, laptops, and large bags are typically not allowed inside.
- Don’t submit vague trip purposes. “Just visiting” or an overly packed, unclear itinerary is a common reason for refusal under Section 214(b).
- Don’t ignore past visa issues. Any prior overstay or violation should be addressed honestly, not glossed over.
- Don’t reapply immediately without changes. If refused, reapplying without fixing the original issue (weak ties, unclear purpose, missing docs) usually gets the same result.
- Don’t assume you can choose your consulate. Your application center is determined by your state of residence, not personal convenience.
- Don’t book flights before your visa is approved. Wait for issuance — processing and administrative review (221(g)) can add unpredictable time.
Frequently Asked Questions
1. What’s the difference between a B1 and B2 visa?
The B1 covers business activities like meetings, conferences, or contract negotiations, while the B2 is for tourism, vacations, or visiting family. Most applicants don’t need to choose between them — they’re usually issued together as a combined B1/B2 visa.
2. How long does the US visa process take from start to finish?
It varies by consulate and season. Appointment wait times alone can range from a few days to several weeks, and if your case gets flagged for administrative processing (221(g)), it can add further delay. Always check current wait times for your specific city before booking flights.
3. Which documents are absolutely required for the interview?
At minimum: your passport (valid at least six months beyond your stay), DS-160 confirmation page, visa fee receipt, a passport-style photo, and proof of ties to home like an employment letter or property documents. Business travelers should also bring an invitation letter from the host company.
4. Can I apply at any US consulate in India, or does it depend on where I live?
It’s determined by your state of residence, not personal choice. For example, applicants from Maharashtra go through Mumbai, while those from Delhi, Punjab, or Rajasthan go through the New Delhi embassy.
5. What happens during the biometrics appointment?
It’s a short administrative visit at a Visa Application Center — your ten fingerprints are scanned digitally and a photo is taken. There’s no interview or questioning at this stage; it usually takes 15–30 minutes.
6. Why do visa applications get rejected?
Most refusals fall under Section 214(b), typically due to weak evidence of ties to your home country, an unclear or inconsistent trip purpose, incomplete documents, or a past visa violation.
7. Is the visa fee refundable if I’m refused?
No. The MRV fee is non-refundable regardless of the outcome, which is why it’s worth getting your documentation and story consistent before applying rather than reapplying repeatedly.
8. Do I need a separate visa if my trip combines business meetings and sightseeing?
No — the combined B1/B2 visa covers both purposes in a single trip, so you don’t need to apply under two different categories.
Official and Authentic Travel Resour
- Embassy of the United States, New Delhi
- Consulate General of the United States, Mumbai
- Consulate General of the United States, Chennai
- Consulate General of the United States, Hyderabad
Travel Guides from Ryde Travel
Final Thoughts
Choosing the right U.S. visa comes down to matching your purpose of travel — tourism, business, study, or work — with the category that legally covers it. Applying for the wrong type, or skipping a required document, is one of the most common reasons applications get delayed or denied, so it pays to double-check eligibility before booking your visa interview slot.
A few things worth keeping in mind as you move forward:
- Start early. Interview wait times at U.S. consulates vary a lot by location and season, so apply well before your intended travel date.
- Keep documentation consistent. Your DS-160 form, financial proof, and interview answers should all tell the same clear story about your travel plans.
- Fees aren’t refundable. Whether you’re approved or denied, the application fee is non-recoverable, so it’s worth getting the category and paperwork right the first time.
- Rules can change. U.S. visa policies are updated periodically, so it’s a good idea to confirm current requirements on the official U.S. Department of State website shortly before you apply.
With the right visa type and a well-prepared application, most travelers find the process straightforward. If you’re planning a U.S. trip soon, give yourself enough buffer time for processing — and consider bookmarking this guide to reference as you gather your documents.
Visa rules and fees change frequently. Always confirm the latest requirements on the official government website of your destination country before booking non-refundable travel.



Leave a Reply